|
How to get a DirecTV DVR player to workI have Time Warner Digital phone and just recently bought DirecTV with a couple of DVR's (Model R10). We got everything working apart from the fact that the unit would never be able to dial the Tivo service to activate and download the programming guides for recording. I called Time Warner and they told me that the digital phone service doesn't support FAX or Modems at this time, so the Tivo unit was basically useless! :( After a lot of research online I found a way to get it to connect and download the information it needed! This of course won't work for everyone, but it will work if you have a PC you can connect to the unit and to the internet at the same time! I've compiled the howto below, and at the bottom of the document I've put links to where I got the information from! That way you can go to the sources too. What you'll need
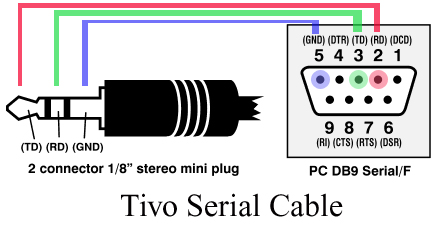
Step 1: Serial CableIf on the other hand, you want to build it yourself, then you'll need to get a 1/8" stereo plug, a DB9 Female connector, and a cable with 3 wires. Connect the wires in the cable according to the following diagram:-
Step 2: Setup of windows Null Driver on WindowsSearch for the section that starts with this: [M2700Reg] ; Null-Modem Append the following to the end of that section: HKR, Responses, "~", 1, 08, 00, 00, 00, 00, 00, 00,00,00,00 ; Server side - the client is requesting a connection HKR, Responses, "<h00>~", 1, 08, 00, 00, 00, 00, 00, 00,00,00,00 ; Server side - the client is requesting a connection Save the file, then remove the following file: c:\windows\inf\mdmhayes.pnf Reboot windows for these changes to take effect. Don't be worried about removing the .pnf file! It is rebuilt when the machine reboots. And the new changes will be incorporated. Step 3: Create a "modem" (Windows)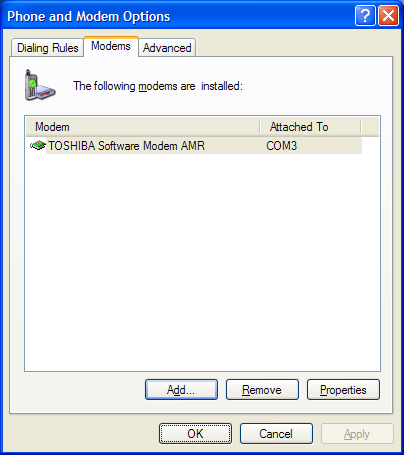 Click on "Add", then make sure the "Don't detect my modem" checkbox is selected,then click on "Next" 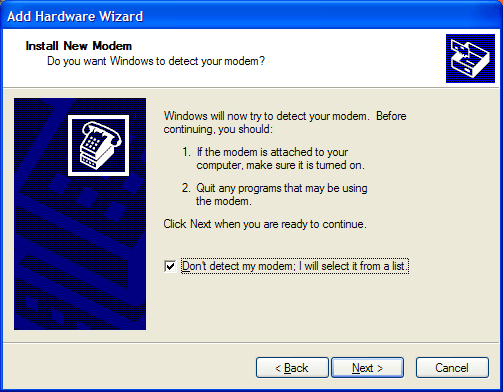 Select "Communications Cable Between Two Computers" and hit "Next" 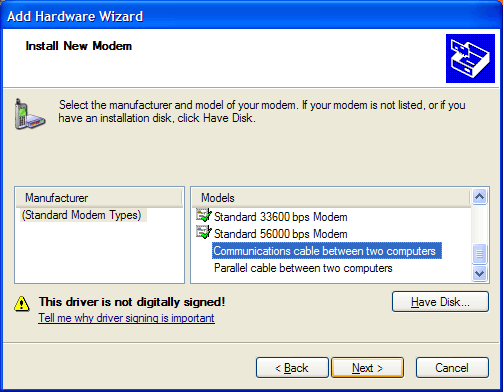 Select the COM port you have connected the null modem cable,if you have an internal modem as well as a COM port, there will be several COM ports listed. The serial port will probably be COM1 or COM2. Select one then click "Next" 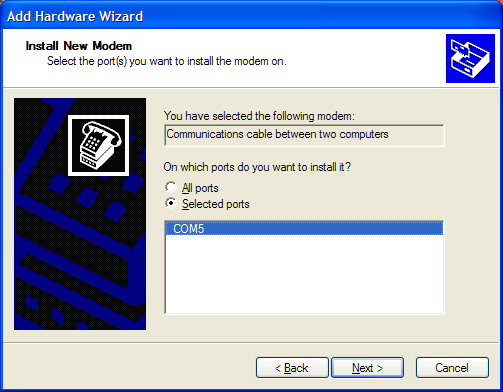 If you get this dialog, Select Continue Anyway. When it finishes setting it up, you should have a new modem, like so: 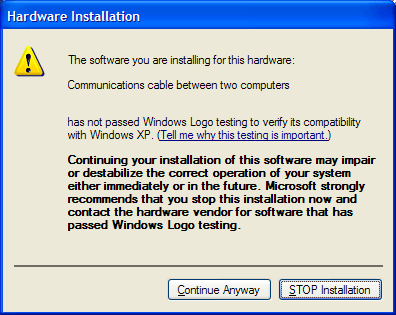 Select the modem and hit properties, then select the "Modem" tab. Set the maximum port speed to 115,200. You can use other port speeds if you like, but you'll need to change the Tivo code to accomodate this. More on this later.  Step 4: Creating an incoming connection for the DVR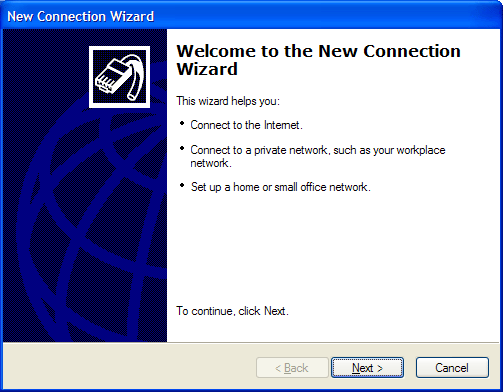 Click Next, then Select "Setup an Advanced Connection" and click Next 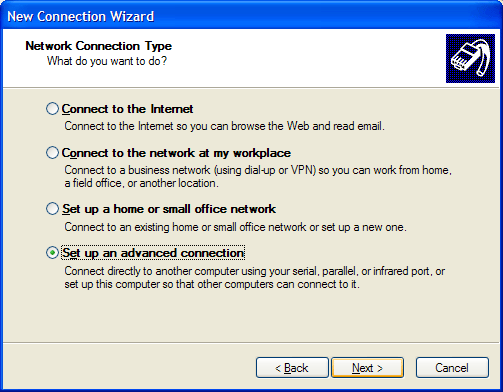 Select "Accept Incoming Connections" and click Next 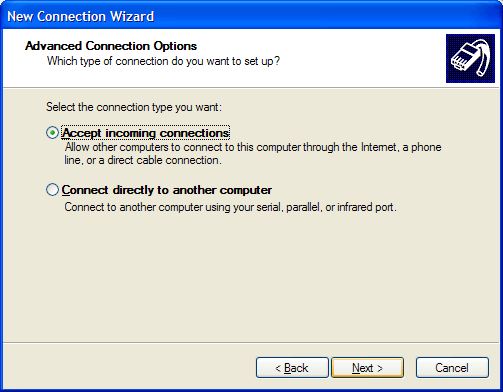 Select the new modem entry you made and click next 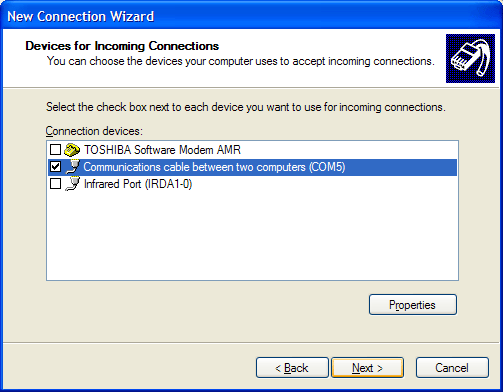 Select "Do Not Allow VPN Connections" (it's not needed for this connection) and click Next 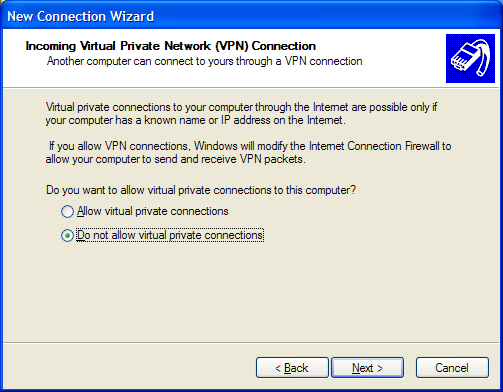 Make sure Guest is checked and also check your own username, then click Next 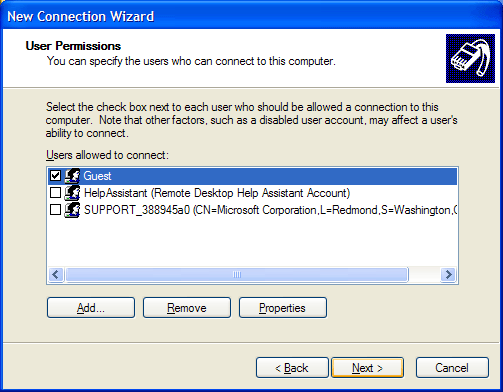 Select the Internet protocol and click Properties 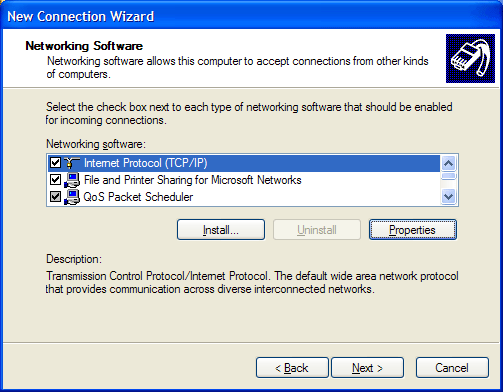 First, make sure "Allow callers access..." is checked. If you have a DHCP server on your network (like a Linksys cable/dsl router doing DHCP), then select "Assign TCP/IP addresses automatically...". If you use static IP addressing, then Select "Specify TCP/IP..." and put in an address range. You cannot put the same address in as the start and end of the range, so you have to have a range of at least 2 addresses. In my experience, the Tivo always gets the start address when it connects using this method. In any case, make your choice and hit OK, then hit Next. 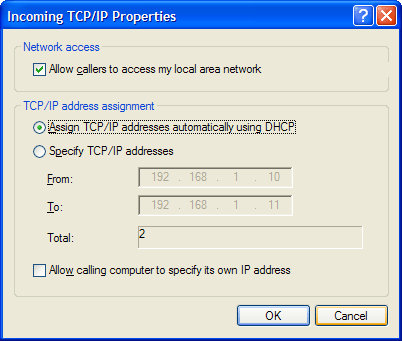 Click Finish. Now, right click on the new incoming connection you just made and select properties then the Users tab. 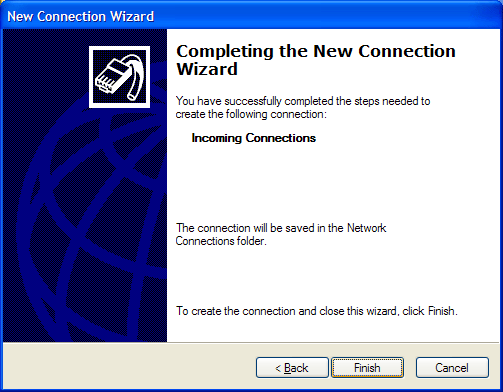 Turn on "Always allow directly connected devices..." 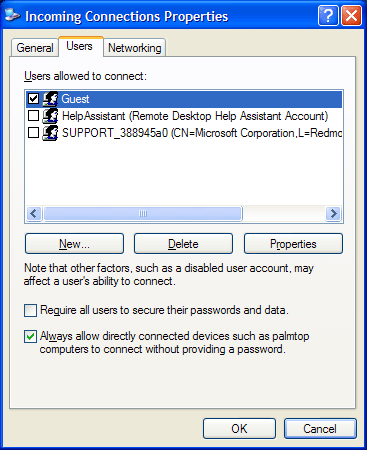 Also, click on the General Tab, select the "communications cable.." and hit properties. Then set the Flow Control to "None". 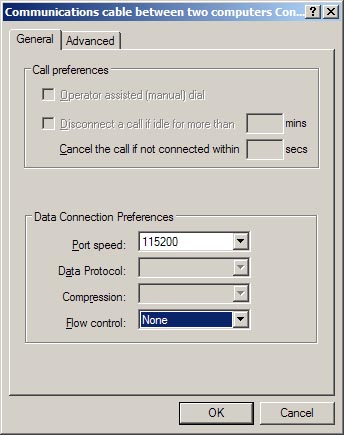 Step 5: Connect DVR to ComputerStep 6: Setup DVR to use the Serial PortWhen the Tivo gets to connecting, you should see a new "Unregistered User" appear next to the Incoming Connection icon. When the Tivo disconnects, that user disappears. A word on port speeds: If you didn't use 115,200 as the maximum port speed, you need to change the Tivo's prefix. ",#211" assumes 115,200. The "11" part of that is the port speed. So if you used 19,200, say, that should become ",#219". Or if you used 9600, that should be ",#296". The last two digits of the prefix string are the same as the first two digits of the port speed you use. It doesn't support anything higher than 115,200, however. Step 7: Enjoy Tivo!Sources | |||||||||||||||||||